Showing posts with label Cooking. Show all posts

Friday, February 22, 2013

Cocoa-Crusted Pork Tenderloin

  
    Earlier this month, I hosted a Chocolate themed dinner club with my girlfriends.  The original plan was to make homemade chocolate croissants, but I was pressed for time that weekend and decided to stick with an old fave: pork tenderloin.  I read through dozens of cocoa-crusted recipes and finally found this one on The Daily Meal. I always like an excuse to try a new tenderloin recipe.

      I know I have talked about pork tenderloin before, but it is a nice meat that doesn't take much work and usually has wonderful results.  I was even excited to use a new meat thermometer I got for Christmas.   The recipe used a cocoa rub and a cherry sauce, so I prepped both of those the night before dinner club.  Then the morning of, I was ready to rock! Let's get cooking...
 
Trim up your tenderloins and lay out on baking sheet for a good rubdown
Heavily sprinkle on spice rub and cover whole tenderloin. You should be smelling of cinnamon now.
They look so innocent and unknowing.
Do a quick sear on both sides, careful not to burn the cocoa.  As you can see, I might need a new, larger frying pan.  Then place back on baking sheet and pop in oven.
 
This is the best shot I could get out of the oven, and although its nice and brown on the outside it was the perfect temperature and light pink on the inside. 
Once your sauce base is ready, stir in cherries and serve over pork! 
 
Here's what you'll need:

Cocoa-Crusted Pork Tenderloin with Cherry Sauce
Pork:
1 tablespoon ground white pepper
1 tablespoon ground coriander
4 tablespoons ground cinnamon
2 teaspoon ground nutmeg 
1 teaspoon ground cloves
4 tablespoons unsweetened cocoa
4 tablespoons kosher salt
2 tablespoons olive oil 
Two 2-pound boneless pork tenderloins
 
Cherry Sauce:
2 teaspoons olive oil
2 large shallots, minced
2 tablespoons fresh garlic, minced
8 sprigs fresh thyme
¼ cup red wine
¼ cup dried cherries
2 cup veal or beef stock
2 teaspoon sugar
2 teaspoon kosher salt

Cooking instructions


Mix all the dry ingredients together. Place tenderloins on a sheet pan and coat well with rub. Let sit for 2 hours.  Preheat oven to 375 degrees. Heat the olive oil in a skillet over high heat. Once hot, place the pork in the pan and sear all sides until brown, being careful not to burn the cocoa. Remove pork from skillet and place in a baking dish and bake in the oven for 20-30 minutes, or until internal temperature reaches 140 degrees.

For the sauce:
Heat oil in a skillet over medium heat.  Add shallot, garlic and thyme and sauté for about one minute.  Deglaze with red wine. Reduce red wine by half and add stock. Reduce by half again and add sugar and salt to taste.  Strain and set aside.  When ready to serve, heat and add cherries.

         As seen earlier at my Chocolate dinner club, serve up with some greens & veggies and enjoy!


Cheers,
Belle

Chocolate Dinner Club

Chocolate. Who doesn't love chocolate?  

         Every month, 11 friends and I get together for dinner club.  The host will choose a theme for the month and everyone brings a dish to share. It was my turn this month! I wanted to do something cute with Valentine's Day but didn't want to over do it with hearts or red & pink foods. So as I was browsing quotes about love, I stumbled upon this one.  Funny that I have always loved Charles M. Schulz, the Peanuts creator. His comics carry such good memories for me. He always blended sweet lessons with humor so well, very fitting that he would blend love and chocolate and set the perfect scene for my dinner club. 

      The only requirement was to to include a chocolate ingredient because...
     "All you need is love, but a little chocolate now and then doesn't hurt." 

 
The lineup included:

Drink
Chocolate martinis
   
Appetizer  
Mini Chocolate Machaca Breakfast Burritos
Fruit with Creamy Chocolate Dip

Salad & Veggies
Mixed Greens with Warm Cacao Nib Crusted Goat Cheese
Cocoa Spiced Roasted Vegetables

Main Dishes
Beef Paleo Chili
Cocoa Crusted Pork Tenderloin with Cherry Sauce
Pinto-Bean Mole Chili (Epicurious)
  
Dessert
Fudge Mint Brownies 
Chocolate Chip Pancakes & Strawberries


 Here are a few of the girls enjoying lunch!

January was Prohibition theme: a hidden alcohol ingredient and March the dishes must be made with local grown food. I can't wait to see what other themes come up throughout the year.  
Food makes for such great conversation and the company doesn't hurt either!

See the recipe for Cocoa Crusted Pork Tenderloin here.

Cheers,
Belle

Monday, February 18, 2013

Puff 'n' Stuff Cookies

As a Valentine treat for someone sweet, I made up some new cookies. Easy & extremely delicious!
 

I took the Tollhouse Chocolate Chip Cookie recipe and added in a few fun items!
A cookie stuffed with so much goodness... I decided to name them Puff 'n' Stuff Cookies... yummo! 

Puff 'n' Stuff Cookies:
  • 2 1/4 cups all-purpose flour
  • 1 teaspoon baking soda
  • 1 teaspoon salt
  • 1 cup shortening or softened butter
  • 3/4 cup granulated sugar
  • 3/4 cup packed brown sugar
  • 1 teaspoon vanilla extract (My secret is 3 teaspoons!)
  • 2 large eggs
  • 2 cups semi-sweet chocolate chips
  • 1 cup mini marshmallows
  • Sprinkles
Preheat oven to 375° F.

Combine flour, baking soda and salt in small bowl. Beat butter, granulated sugar, brown sugar and vanilla extract in large mixer bowl until creamy. Add eggs, one at a time, beating well after each addition. Gradually beat in flour mixture. Stir in morsels and marshmallows.
 
Scoop tablespoons of dough and roll into 1-1/2 balls.
 
Dip balls into a small bowl of sprinkles.  
 
Bake for 9 to 11 minutes or until golden brown. Cool on baking sheets for 2 minutes; remove to wire racks to cool completely. 
Enjoy and Share!
Cheers,
Belle

Thursday, January 3, 2013

The Case of Too Many Carrots

The Case of Too Many Carrots: Solved

 Make Carrot Cake Bars. 

I love fresh produce. I hate throwing out fresh produce. So, I noticed I had a lot more carrots in my fridge then I could eat in the next few days. I shredded those carrots and put on my thinking cap. Carrot Cake Muffins were definitely going down... but what else could I make. With a family gathering coming up, I went sweet and decided on these carrot cake bars.  They were really easy and tasted so yummylicious!!! 

                                    
Not paleo, not healthy, but man.. they were good. I have been trying to use up all the dairy, flour and sugars I bought for the holiday family recipes I make. And when you know that your home eating is still on track, it's okay (at least to me) to splurge and indulge at times.

Also exciting, I used my KitchenAid Mixer for the first time in years. Maybe 3 years. It's been just collecting dust in the corner of my kitchen. I just prefer the ease of grabbing my hand mixer and a bowl.  Okay, enough blabbing... let's get to the good stuff.

Carrot Cake Bars:
  • 1 cup sugar
  • 3/4 cup vegetable oil
  • 2 eggs
  • 1 cup all-purpose flour
  • 1 teaspoon cinnamon
  • 1/2 teaspoon baking soda
  • 1/2 teaspoon salt
  • 1 cup freshly shredded carrots
  • 1/2 cup chopped pecan, walnuts or sunflower seeds
  • 1 can (16 ounces) cream cheese frosting or homemade Cream Cheese Frosting
Step One: Preheat oven to 350 degrees. Dust off old mixer. Or just get out a bowl and hand mixer Winking smile 

Step Two: In a large bowl using an electric mixer, beat the sugar, oil and eggs until light.


Step Three: Stir in the flour, cinnamon, baking soda and salt until well combined. Gently stir in the carrots and nuts/seeds. (I just continued to use the mixer on low speed, worked fine!)


Step Four: Pour the batter into the prepared pan. Bake until a toothpick inserted in the center comes out clean, 25 to 30 minutes. Transfer the pan to a wire rack and cool completely. 


Step Five:  Spread the bars with enough of the frosting to cover completely. You can drag a fork through the frosting on a diagonal to decorate. I just spread on a nice thick gooey layer and called it a day. Cut into 2-inch squares and remove from the pan. 

Step 6: Try not to eat them all!!! 


I also had extra cream cheese from another holiday recipe I did, so I went for the homemade frosting. I usually don't like cream cheese frosting so I altered the recipe & added a little more vanilla and sprinkled in a little lot of cinnamon. 

Cream Cheese Frosting:
  • 4 ounces unsalted butter, softened
  • 4 ounces cream cheese, softened
  • 2 cups powdered sugar
  • 1 teaspoon vanilla extract (I did 2 teaspoons)
  • 2 teaspoon cinnamon (my addition)
In a large bowl, beat together the butter and cream cheese with an electric mixer. With the mixer on low speed, add the powdered sugar a cup at a time until smooth and creamy. Beat in the vanilla extract and cinnamon. Then use for your recipe... mmmm mmmm good.


I may have changed my own mind about cream cheese frosting. Wowzer!


Saturday, January 7, 2012

Tri Tip Tortilla-less Soup

I am a big fan of tortilla soup and a few weeks back when I made Slow Cooker Tri-Tip, I had an idea to use the leftover meat in a "tortilla" soup. After the slow cooker, I froze half of the shredded tri tip so it was easy to use when ready.


There is no special recipe, just a hodge podge of veggies and spices.  The fun thing is you can make it vegetarian or with meat, spicy or mild, creamy or brothy (yes, I just made that word up). 

Tri Tip Tortilla-less Soup
2 cups broth of choice
2 cups shredded tri-tip
1 can black beans
1 can corn kernels
1 can diced tomatoes (with green chiles adds extra spice)
1 chopped yellow or white onion
1-2 chopped jalapenos, depending on size
Chili Powder
Cayenne Pepper 
Oregano
Salt & Pepper
Avocado, cheese, corn and beans for topping

 
Canned veggies make it quick and easy
 Boil the broth, corn, beans, tomatoes and meat for a few minutes and then reduce to simmer
 Coarsely chopped jalapeno and onion
 
In they go... time for some simmering and spices
Look at all that meaty goodness!
 Chop some avocado and squeeze in fresh lime when soup is ready to be served
 Enjoy a hearty meal!

Don't forget you can always divide the extra portions and freeze for lunches or quick-fix dinners down the road... All my tri-tip is gone now, what next?

Wednesday, December 21, 2011

128 Tamales Later...

About a year ago, I made a list of 30 things I want to do before I turn 30 (which is now in 2 months!)  One item on the list was to host a tamale cooking day with my girlfriends.   Monday was the day!


A few years back I was lucky enough to get a recipe from someone whose recipe came from the tamale knowledge in her head.  I know that sounds silly, but what I mean is that she knew her tamales by heart.. she didn't need a recipe so as she told me the process over the phone, I scrawled it down quickly and made my first batch of amazing tamales. 3 years later, the recipe still lives!


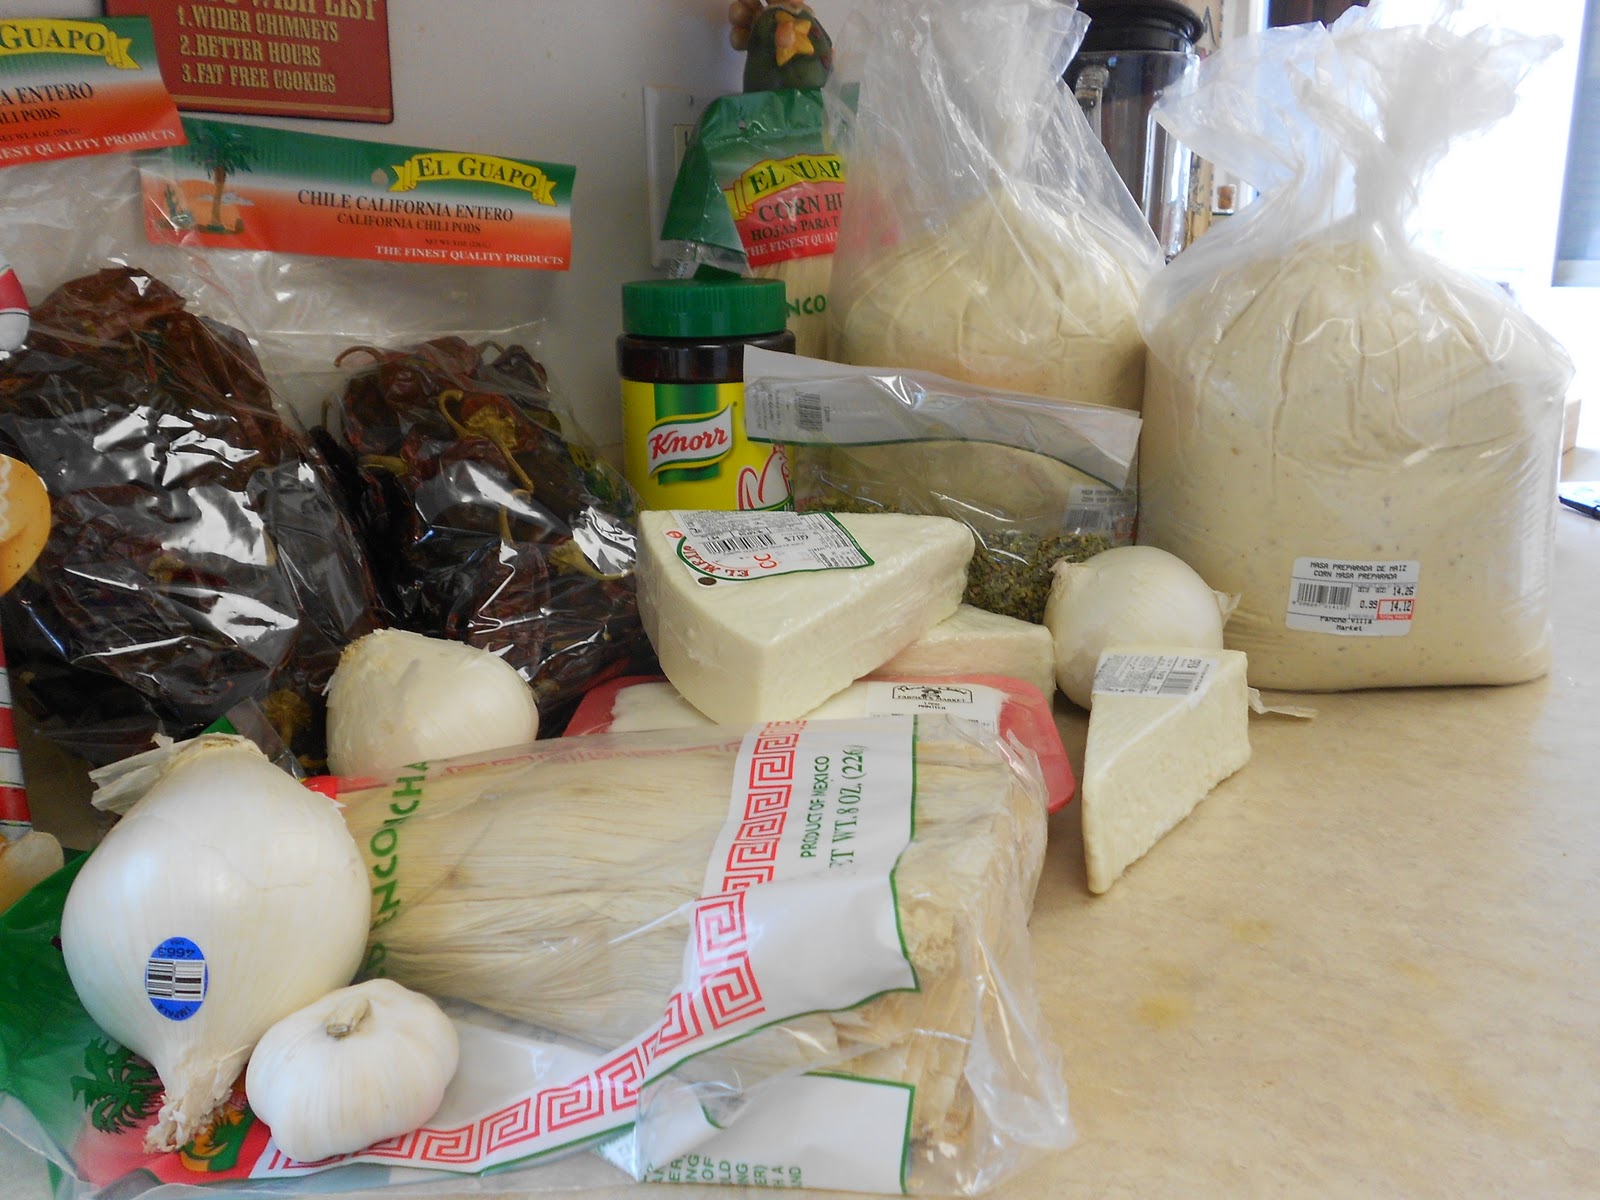
I pieced the recipe back together by memory, thankfully I had done this once before... but we were tripling the recipe also!  First you need to rinse and dry the corn husks...


Stephanie and I began mixing the masa and broth together, while Amanda and Laura started on the chiles. My mom weighed out 3 pounds of cheese for the masa and everyone was involved!

Breaking the cotija into the masa

After the masa, broth and cheese are mixed together, we seeded the chiles and then blended with some reserved chile water, onion, garlic, cinnamon, cloves, oregano and thyme. The recipe called for "spoonfuls" of all which was hilarious because its just kind of a guess! What type of spoon? A big or small? That is why tasting your mixtures is essential. You can always add more flavor or more chiles and spice.

Then we got the lard hot, hot, hot and added the chile mixture to thicken. Watch out for splashing lard!

Now everything was prepped and we were ready to assemble.  Lunch break!  Then we got back to work and started spreading, filling and wrapping the tamales. 

After they were wrapped and ready, we stood them in a pot with steamer and cooked for about an hour. High heat but be careful the water doesn't run out... you will end up with some burnt smoky tamales (that happened to one batch!) A trick is to put towels on top of the pots so it releases less steam. 

                           
Exhausted but ready for this first tamale

We aimed for 75 tamales and ended up making 128!!!! Our freezers are full of tamales and we even talked about possibly making this a holiday tradition.  As Christmas approaches, I am thankful to have so many wonderful friends in my life. What are you thankful for?